TSoM eMMC Programming Guide
From Terasic Wiki
This guide will show you how to program the Linux image into the eMMC device on the TSoM module and explain how to update device tree and zImage in the eMMC device.
1.1 Re-flash linux image to emmc memory
- Prepare a Micro SD card (minimum 4GB capacity) for Linux boot.
- Download the image file form the link below and use the tool such as "Win32 Disk Imager" to write the linux image file(tsom_linux_console.zip) into the Mircro SD card.
- Download the eMMC image file from the link below and extract it, then copy the image file(tsom_emmc_168M.img) to the fat partition of sdcard
- Insert the Micro SD card into the TSoM evaluation kit.
- Make sure MSEL[4:0] is set to FPPx32 mode, so the FPGA can be configured by HPS.
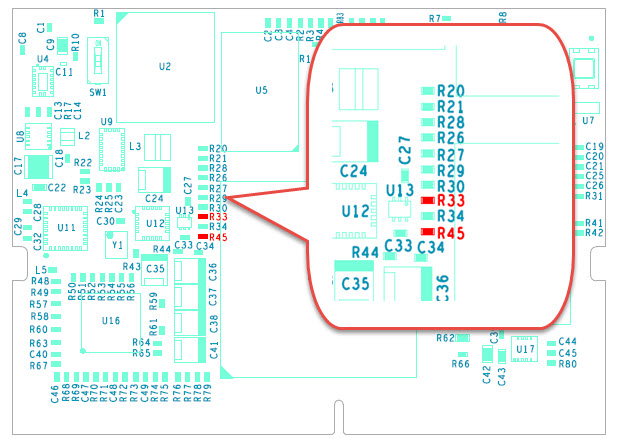
- Please install the 1K ohm resistors in the red resistor position in the figure below.
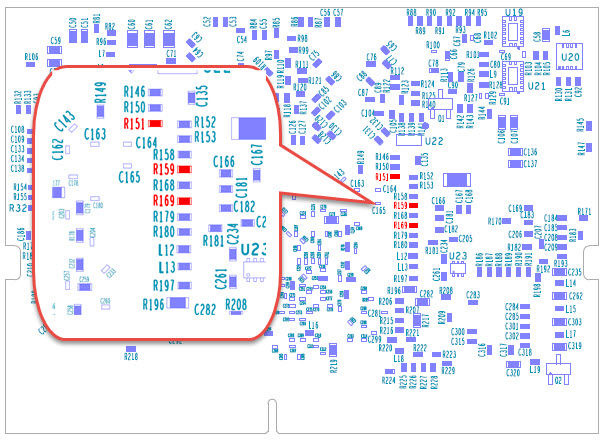
- Confirm that the red resistor position in the figure below DOES NOT have any resistors installed.
- Make sure that SW1 on the TSoM is cut to the Off position, which represents the HPS boot from the SD Card.
- Connect the PC and TSoM evaluation kit via mini USB cable and connect the Power adapter to power on the board.
- Use the terminal emulation program such as Putty on the operating system to connect to Linux running on TSoM
- Press the CPU reset button on the TSoM module and wait for the "Hit any key to stop autoboot :5" to appear in the Putty window. Press any key to enter uboot.
- Enter the command "fatls mmc 0:1" to view the contents of the sdcard fat partition.


