DE10 Advance Board Setup: Power up the DE10-Advanced Board with LXDE VNC Desktop Environment
From Terasic Wiki
To power up the board and run the LXDE VNC desktop(default), perform the following steps below:
- To perform this power up test, user will need some additional parts as list in below:
- A micro USB OTG cable.
- Ethernet cable.
- Router/Switch
- Connect the provided power cord to the power supply and plug the cord into a power outlet (verify the voltage supplied is the same as the specification on the power supply).
- Connect the Ethernet port of DE10-Advanced to an Ethernet switch on the same network as the host computer.
- Make sure the Factory SD Card is inserted in the SD Card socket.
- Connect your computer to the development board by plugging the USB cable into the Mini USB B type connector(J27) of DE10-Advanced.
- Connect the supplied DE10-Advanced power adapter to the power connector (J28) on the DE10-Advanced board. At this point, you should see the 12V indicator LED (D31) turned on.
- Set up UART terminal for Linux booting up (See Chapter 5 for the details). It will take about 35 seconds to boot the Linux.
- Set up the DE10-Advanced board IPv4 network addresses via Ethernet: such as 192.168.0.123 or 192.168.1.123. Use ifconfig to change the IP address: ifconfig eth0 192.168.86.123 to change your board’s IP address. In this command 123 is just an example—it can be any number that is not already being used in your router’s subnet. Note that eth0 is the name of an ethernet port that is available to Linux.
- Set the host computer’s network address on the same subnet for the DE10-Advanced board connection. It means that the host computer’s network address must be of the form 192.168.0.xxx or 192.168.1.xxx.
- Configure the Host Computer’s IP Address
- 1). If you are using Windows OS, go to Windows Control Panel, open the Network and Sharing Center item. Click on Change adapter settings, then right-click on your Ethernet adapter and open the Properties dialog. Highlight the Internet Protocol Version 4 (TCP/IPv4) item and click Properties. In the General tab click Use the following IP address. In the IP address field enter 192.168.0.xxx (or 192.168.1.xxx), where xxx is a number of your choosing (that is not already being used in the subnet). In the Subnet mask field enter 255.255.255.0. Leave the Default gateway field blank, as shown in Figure 2-4.
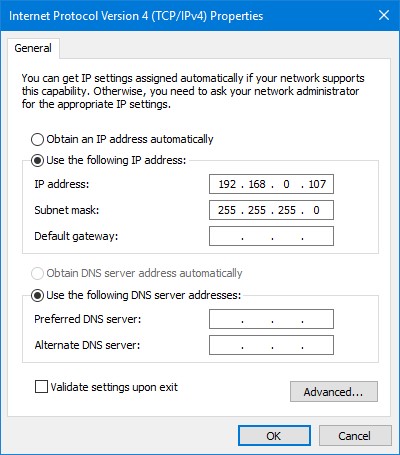
- Figure 2-4 Host Computer IP Address
- 2). If you are using Linux on the host computer, the IP address can be changed by using the ifconfig command. If your Ethernet adapter were called eth0, then the command would be ifconfig eth0 192.168.0.xxx (or 192.168.1.xxx), where xxx is a number of your choosing (that is not already being used in the subnet). If your Ethernet adapter is not called eth0, then replace this field with the actual name of your Ethernet port.
- Use a VNC Viewer application on the host computer to connect to the Linux GUI. We will be using the RealVNC Viewer that is available for Windows computers. For Linux host computers you can use a VNC Viewer such as the Remmina application that is included with some Linux distributions.
- The VNC Server address is specified assuming that the default IP address 192.168.0.123 is being used, and port 5901 is specified as required.
- Click on the Connect button, as shown in Figure 2-5.
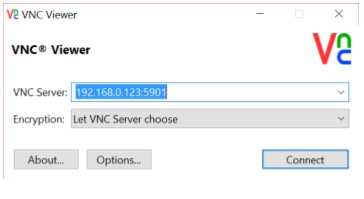
- Figure 2-5 The RealVNC opening dialog


- Finally, the screen will enter VNC desktop on the monitor (See Figure 2-6 ).
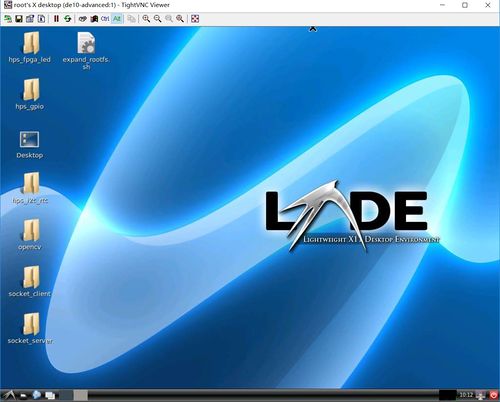
- Figure 2-6 LXDE Desktop Environment

- After the system is ready, connect a Mouse/Keyboard to the USB OTG port (J26) via Micro USB OTG Cable (*1) (*2).
- Now, user can use mouse/keyboard on the LXDE desktop.
(*1) Because the USB gadget function is enabled by default in the LXDE system, any external USB device needs to be connected to the DE10-Advanced AFTER the VNC boots up. Otherwise the external USB device will not be detected by the system.
(*2) Some USB mouse or keyboard may have compatibility problem with the LXDE system, if user’s mouse or keyboard don’t get any response in the LXDE system, please re-plug the USB cable or change to other brand’s USB mouse or keyboard.