DE10 Advance Running Linux via UART Terminal: Setting Up UART Terminal
From Terasic Wiki
This section presents how to install the drivers for the USB to UART chip on the DE10-Advanced board and how to set up the UART terminal on your host PC. The DE10-Advanced board communicates with the PC through the Mini-B USB connector J27, as shown in Figure 5-1. You should install the USB to UART driver and configure the UART terminal before you run Linux on the board.
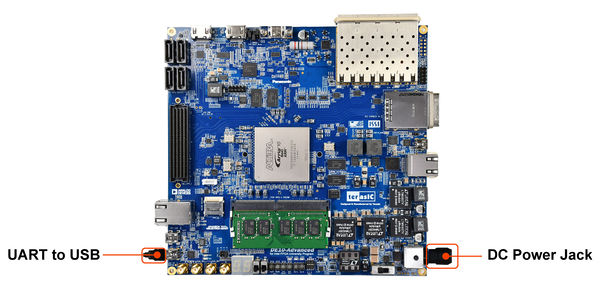
- Figure 5-1 Hardware Setup for UART Terminal

Installing the Driver
This section explains how to install the drivers for USB to UART communication. The necessary steps on Windows 7 are:
- Connect your computer to the development board by plugging the USB cable into the micro USB connector (J27) of DE10-Advanced. (connection shown in Figure 2-3)
- Power on the board and open the computer device manager in Windows. You will find an unrecognized FT232R USB UART, as shown in Figure 5-2.
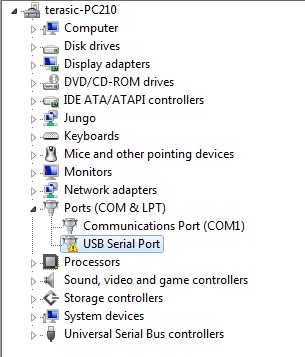
- Figure 5-2 Unknown serial device on device manager

Select the FT232R USB UART to update the driver software. The driver can be downloaded from http://www.ftdichip.com/Drivers/VCP.htm.
- After the driver has been correctly installed, the USB Serial Port is recognized as a port such as COM6 (Open the device manager to know which COM port assigned in your computer), as shown in Figure 5-3.
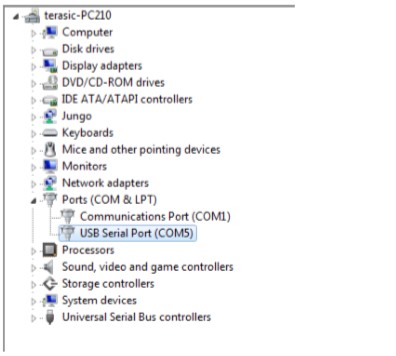
- Figure 5-3 USB Serial Port driver is installed correctly

- Now you can power off the DE10-Advanced board.
Configure UART terminal UART terminal spec
- 115200 baud rate
- no parity
- 1 stop bit
- no flow control settings
The following steps shows how to configure a PuTTY terminal window (can be downloaded from the link: http://the.earth.li/~sgtatham/putty/latest/x86/putty.exe)
- Open putty.exe, click Serial go to a serial configure interface.
- Configure the window like the flowing picture and click “save” button to save the configuration, as shown in Figure 5-4.
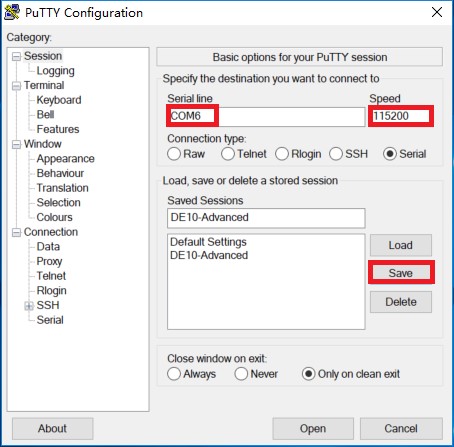
- Figure 5-4 Putty Window
