DE10 Advance revC demo: HDMI TX in 4K Resolution
From Terasic Wiki
Contents |
Introduction
Compared with the Section 2.7 HDMI Retransmit demo, the difference of this demonstration is that only the TX of the Intel® FPGA HDMI IP cores is used in the FPGA. This demo also has a video test pattern generator built into the FPGA. The highest resolution 4K image is sent to the HDMI TX IP. It is displayed via an external HDMI monitor.
System Block Diagram
Figure 1-1 shows the system block diagram of the demo. First, Nios is used to generate the test pattern output to the HDMI TX IP. The resolution of the generated pattern can be 4K or Full HD(1080). User can switch the output resolution instantly through the Switch on the DE10-Advanced. The HDMI TX IP is identical to Section 2.7.

- Figure 1-1 The System Block Diagram of the demonstration
Design Tools
- Quartus Prime 18.0.0 Standard Edition
- Nios II Software Build Tools for Eclipse 18.0
Demonstration Source Code
Projet Loacation : System CD\Demonstration\FPGA\HDMI_TX_4K\
- Quartus Project directory: HDMI_TX_4K
- Nios II Eclipse: HDMI_TX_4K\software\
- Demonstration Batch File:
- Demo Batch File Folder: HDMI_TX_4K\demo_batch\
- The demo batch file includes following files:
- Batch File for USB-Blaseter II: test.bat, test.sh
- FPGA Configure File: HDMI_TX_4K.sof
- Nios II Program: vip_control.elf
Hardware Requirement
- a PC
- An HDMI monitor capable of displaying 4K/60P
Demonstration Setup
- Make sure Quartus Prime and Nios II are installed on your PC.
- Connect a HDMI monitor to the DE10-Advanced as shown in Figure 1-2.
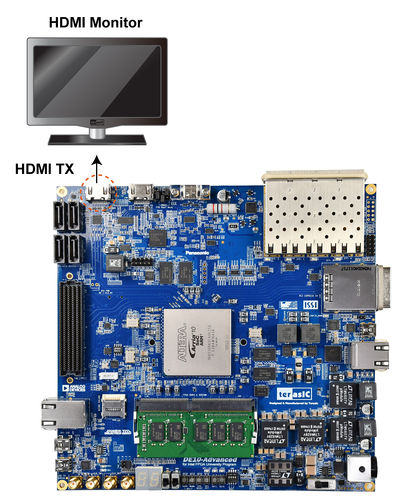
- Figure 1-2 Connection setup of the HDMI TX monitor and DE10-Advanced
- Connect the USB Blaster II port on the DE10-Advanced to the computer using the usb cable (do not connect the HDMI video player at this time).
- Open DE10-Advanced power and execute demo batch file : test.bat
- Waiting for FPGA code download completed
- Check if the test color pattern is shown on the HDMI monitor(See Figure 1-3)
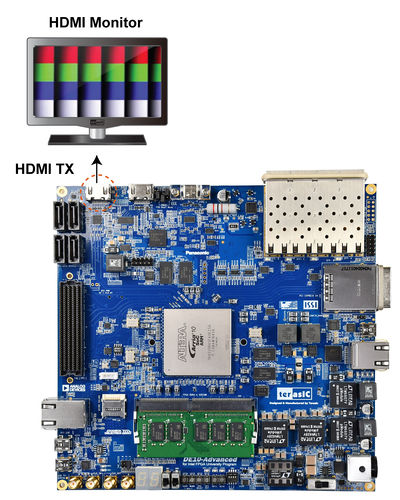
- Figure 1-3 Test color pattern is shown on the HDMI monitor
- User can switch SW[1:0] to change the resolution of the test patter output. The relationship between the detailed screen resolution and the switch is shown in Table 1-1.


- Table 1-1 Switch setting for the resolution of the test pattern
SW[1:0] Resolution Setting 00 1080@60P 01 4K@60P 00 1080@60P (Same with the SW[1:0] = 00) 01 4K@30P